Final Cut Pro: What Do You Do When Your Soundtrack Sucks?
Feb 14, 2004 · peterb · 7 minute readFinal Cut Pro
Last night I finished my first large project, a 25 minute oral history documentary about my grandmother. I’ve been working on it, on and off, for about six months. When I started, I didn’t know anything, really, about video production, and now, through the arduous process of making tons of mistakes, I probably still don’t know enough to claim to be skilled. However, I am very good at screwing things up. So I do at least have some information to share with you, which is “Here’s what I learned by screwing up.”
The most important thing I learned is: in a video project, what you hear is more important than what you see. That’s a pretty controversial statement, so let me explain a little bit. What I really mean to say is that producing good (or at least acceptable) audio for a video is harder than producing good (or at least acceptable) video. It’s harder for a few reasons: when we are shooting video with ‘basic’ equipment (a camera, some lights, a tripod) we have better previews available to us of video than we do of audio. Deciding whether the video is right is easier than deciding if the audio is right. We have better and more powerful editing techniques to cover up subtle video mistakes in postproduction than we do to cover up audio mistakes. Discontinuity in video has a different (and easier to compensate for) psychological effect on film and video viewers than discontinuity in audio.
So with that in mind, let’s talk about some of the ways you can improve the audio on your video production. Up front let me say that I’m not trying to tell you how to improve the quality of the audio during the shoot. I’m far too inexperienced to be able to advise even a five year old child on such matters, so if your goal is “get better audio into my editing software,” I will simply recommend that you pick up a copy of Jay Rose’s superb book [Producing Great Sound for Digital Video](http://www.amazon.com/exec/obidos/tg/detail/-/1578202 086/theusualsuspepat), and follow that. This article, instead, is targeted at people who, like me, have already screwed up their project and have captured crappy audio. How do you know if you’ve captured crappy audio? Here are some rules of thumb: if you have thought more about lighting then about sound, your audio is inadequate. If you used an on-camera mic, your audio is inadequate. If you didn’t have someone monitoring the audio during the shoot while you concentrated on the visual aspects, your audio is probably inadequate.
Don’t use any audio from your camera
Getting decent audio quality is, as I observed, hard. It requires forethought. It requires some expense – a mic and perhaps a mixer or balanced adapter. It requires effort and care during the shoot. And it requires attention during postproduction. So one of the easiest ways to deal with all of this is: punt! Plan to not use any in-camera sound at all. Making a film of your kid’s soccer game? Find a piece of music you like and use that in the background. Making a short film for fun? Use silent film techniques and dialogue cards. Making a nature film? Record voice-overs later using better equipment than you have in the field. Obviously, you can’t take this route for every (or even most) projects, but it’s worth mentioning as a reasonable choice.
Listen Carefully
Video is easy to evaluate. Put an image up on the screen; your eyes will instantly evaluate it and you can say things like “That’s too dark,” “It’s out of focus,” “The frame is unbalanced.” Audio can be trickier to tease out. Often, the idiosyncracities of an audio mix are only apparent when listening at a certain volume, or in a room with certain acoustical properties. With my present project, I knew I had problems with the audio mix, but I thought I had brought them mostly under control. When I previewed the rough cut for my grandmother, who has hearing problems, we turned the volume up substantially. All of the blips and transition problems that were barely – or not – perceptible when listening at a normal volume became monstrously apparent and distracting.
The lesson here is: I was editing on a computer. But the video was watched in an entertainment room. No one watches TV from 10 feet away with the volume as low as they do when working on a computer one foot away. Either turn those speakers waaaaaay up or, better yet, get a set of good headphones and always use them while editing.
Room Tone
For each scene that you edit, find a gap where no one is talking and cut it into its own short clip. This is the “room tone” for that scene. When you’re done with your edit, look along your timeline and find any places where there are audio gaps (on my project, for example, I used title cards to introduce certain segments; those title cards didn’t have any audio with them. The first time I watched the video at full volume the first cut to the title card, with its hard, sharp, cut to no audio made me wince). Insert room tone – hopefully from the scene you are in – into those gaps. You can use the crossfade audio transition effect to smooth the transition between your room tone and the ‘real’ soundtrack, but if you play your cards right you shouldn’t even have to do that. If you feel that room tone is inappropriate for your project, consider using an audio fade-in/fade-out filter to lessen the harshness of jumps to and from black.
The ear is superb at detecting discontinuities. If you have a jump from room tone to no sound at all your viewers will hear it and be discomfitted by it, even if they aren’t consciously aware of it. Know room tone. Love room tone. Use room tone.
The rule of thumb here is “even room tone that sounds bad is probably better than no room tone at all.” Another rule of thumb is: when you’re previewing your video, pay as much attention to the quality of transitions between scenes as you do to the content and quality of the scenes themselves.
Postprocessing
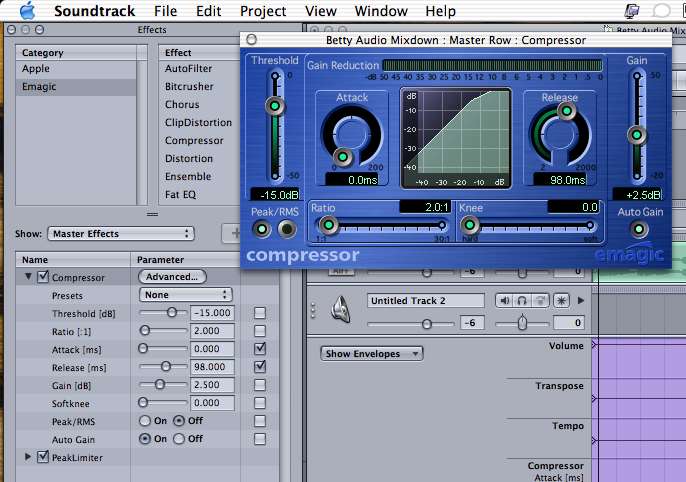
So far I’ve found Final Cut Pro’s audio filters to be less than thrilling. They don’t seem to work very well to me, and the range of control they give you is very limited. However, the filters included with Apple’s bundled Soundtrack program are superb, and Soundtrack integrates very smoothly with Final Cut. For almost any dialogue-driven project where you haven’t carefully mixed at capture time you can’t go far wrong in putting a compressor filter into the loop. If you have lots of fricatives and plosives in the mix you can use a limiter to smooth them out. If there’s a constant background noise and you are very very lucky, you might be able to use the band pass filter to reduce its impact. Play around with the filters in Soundtrack. Explore.
Listen Without Watching
When you think you’re approaching the sort of sound mix you want for your project, hook your computer up to good speakers or headphones, get a notebook and a pen, play your project, and turn off the monitor. Just listen. Listen carefully. I guarantee you you’ll find at least three problems that you didn’t notice when you previewed your project while watching. Make notes on the problems when you find them, and go back to the drawing board to see how you can correct them.
I hope you’ve found this little discussion of what I learned by screwing up my project helpful. If you have tips of your own, feel free to use the comments section below to share them.