
The subject of exposure in photography is filled with confusion. On the one hand, automatic exposure systems have largely freed the general public from ever thinking about the problem except under dire circumstances. On the other hand, beginning photographers who aspire to become serious workers in the medium are usually overly obsessed with the technical aspects of “correct” exposure. Even the idea of correct exposure is hard to pin down. You could argue that you can’t know the correct exposure for a picture without knowing what the subject is. And yet mostly automatic cameras mostly do a good job. How does this work out? Are they just guessing well?
The truth is, the more you understand about exposure, the less you should have to think about it. It’s as close to a zen paradox as you get in photographic technique.
Setting things up
In general terms, the exposure for a picture is how much light is allowed to hit the film or digital sensor. If you imagine that a camera is a box with a hole on one end and a light-sensitive material on the other, then three things determine the exposure for any given picture. First, there is the time, or how long you hold the film or sensor in front of the hole. Of course, a modern camera has a shutter mechanism that opens and closes in very precise intervals, so the time component of exposure is usually called the shutter speed. The longer the shutter stays open, the more light hits the film. Second, there is the aperture or the size of the hole. This size determines how much light per unit time is hitting the film plane. Aperture is generally denoted using a weird notation called an “f-stop”. You will see markings on lenses like “3.5 4 5.6 8″ and so on. These are called “f-stop” numbers and are a relative measure of how wide open the diaphragm inside the lens is. The smaller the number, the more light is reaching the film plane of the camera.
The modern fancy camera has two dials with which you set exposure, one for shutter speed and one for aperture. Any given pair of settings allows a single and unique amount of light to hit the film plane. To increase exposure, either increase the shutter speed or you open the lens wider. Similarly, to decrease exposure you either decrease the shutter speed or close the lens down. The controls have been standardized so that the shutter speeds and the apertures progress in factors of two. When you exactly double or halve the exposure, this is referred to as changing the exposure by a “stop”. Now that I think about it, the origin of this terminology is unclear to me, but it’s probably related to the f-stop numbers on the lens. Electronic cameras usually also allow you to change the exposure in intervals of 1/2 or 1/3 of a stop for finer control.
For the purposes of this article, I’m going to ignore the other effects that aperture and shutter speed can have on a picture. For now, all that we are concerned about is that they are the two numbers that you set in the camera that determine how much light hits the film or the sensor.
The third factor needed to determine the exposure for a picture is a measure of the sensitivity of the film or sensor you are using. Here is where we take a bit of a technical digression.
Middle Gray
In the old days, what we would do is expose film to light and then run it through a series of chemical baths. At the end of this process, we would have little pieces of plastic with negative images on them. The parts of the film that got more light would be darker, whereas the parts of the film that got less light would be lighter. On the print, the effect would be reversed. Therefore, if you expose the film to more light, the final picture comes out lighter. This seems obvious, but it’s important.
The final piece of the exposure puzzle is this: how can you systematically express how bright the photo will be for a given exposure? It turns out that an international standards body has defined this for us. The ISO rating of the film, also referred to as the “speed” of the film is a number that essentially tells you how much light you have to give the film for it to reach a standard average density. This standard density is usually referred to as “middle gray”. It’s a pretty dull color, not really a nice light gray, not really a nice dark black. It’s just average. The higher the ISO number, the “faster”, or more sensitive, the film is. Fast film needs less light, slow film needs more light.
So here is the answer to how the camera chooses exposure for you. Assume you have told the camera the ISO rating of the film. Inside the camera body is a little chip that is sensitive to light. What the camera does is use this chip to figure out how much light is hitting the film plane. The camera now combines this information with the film speed and makes up an exposure that will result a middle gray picture. That is, it gives the film enough exposure so that if you had pointed the camera at a sea of middle gray, the resulting picture would come out middle gray.
At this point, I can hear the non-photographers objecting. You didn’t point the camera at a gray card, you pointed it at Aunt Betty or Grandma, or the new baby. How can this possibly work? It turns out that most of the scenes that we point cameras at have a distribution of tones in them that averages out at middle gray. That is, parts of the picture might be brighter and other parts of the picture might be darker, but in general you get lucky and everything averages out. There are notable exceptions, but given how well most all-auto cameras work, they are fairly rare. Luckily, there is a simple rule to compensate for this:
1. If your picture is dominated by light tones, the camera will expose the picture so these tones are gray, not white. Therefore, tell the camera to expose more. Compare these two pictures of a truck. The first one is exposed at the suggestion of the camera meter:

After telling the camera to give a couple of stops more exposure, you get this

Now the truck is a nice white like it was when I walked past it.
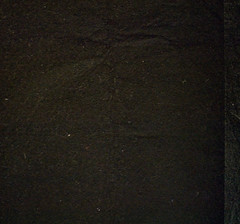
2. If your picture has a lot of dark stuff, then the camera will make it middle gray instead of dark. Therefore, tell the camera to expose less. Again, as an example, I took this shot of a black rug I have in my house. It’s blurry because I didn’t have a tripod. Notice that at the exposure the camera suggested, the black rug is the same tone as the white truck was above:

Tell the camera to expose a couple of stops less, and you get a nice dark tone closer to black:
So remember, to make light stuff light, expose more. To make dark stuff dark, expose less.
One final digression: One of the best things about shooting with digital cameras is that the your “film speed” is not fixed. The camera manufacturers have calibrated their sensors to follow the ISO scale, but the camera lets you set almost any speed you want whenever you want to. You usually trade off image quality at the highest speeds, but it’s usually worth it. Some cameras, like my favorite Nikons, also have a delicious auto-exposure mode that shift the ISO higher for you to maintain shutter speed or aperture. This means you can go from taking pictures outside to in your house without forgetting to reset the ISO. This is good for old forgetful people like me.
Contrast Kills
At this point, we might think that we have the exposure question licked. All you need is a calibrated film speed, a calibrated meter and some smarts about when to override the camera. This would be true, except for one more tricky problem: contrast.
As I write this, I’m looking out my window. The room is lit only by the indirect dusk light. The yard outside is in shadow, and the sky above the yard is lit by the setting sun. To my eye, the whole scene is pretty flat and it’s easy to see detail in both the darkest and lightest parts of what I am looking at.
Here is the problem: you can’t capture this contrast range on film or in a digital file. If you get the dark room light enough, everything outside will be a bright white. If you get the sky the right color, everything in the foreground will be black.
I took a picture out my window of the nice sky:

Notice how everything else in the shot is black.
In a situation like this, the photographer has to pick what part of the picture is the most important and set the exposure appropriately. So, if you want detail in the dark parts of the picture, you expose for the shadows and just live with the fact that the bright parts of the picture will be white. Conversely, if you want to capture the fabulous light in the sky, you will have to give up detail on the ground. Of course, there are ways to cheat. If you do your own black and white printing, sometimes you can balance the contrast when you make the print. Certain extremely skilled landscape photographers have also mastered the use of special filters that can balance the sky with the ground. Finally, in the digital age, you can take two pictures of the same scene, one dark and one light and then stitch them together later.
The fact that your film or digital sensor has a limited dynamic range is something that you will find yourself fighting a lot. It’s important to know where you have more leeway. For example, old style print films (and black and white) tend to forgive overexposure more than under. That is, they can hold detail in the bright parts of the photo but not the dark. Slide film and digital sensors tend to go the opposite way. They can hold detail in pictures that are too dark, but if you blow the highlights out you will just get large areas of blank white. In either case, the important thing to remember is that you expose the picture so that the subject you care most about is well within the available contrast range. If you let drift too far one way or the other, you will lose detail.
Summary
Since I am an engineer by trade, I have given you an overly complicated and technical explanation of what is going on here. There are three things you need to remember:
1. The camera exposes for middle gray.
2. If the subject is not middle gray, you need to compensate by increasing or decreasing the exposure appropriately.
3. You need to take scene contrast into account when picking your exposure.
With enough practice, you will get used to reading the light in front of you and doing the right thing by reflex. Then you can forget about all the complicated details in this article and just shoot pictures.


A too am an engineer, so perhaps you can give me some technical insight. For a given scene, when you raise the ISO on a digital camera, are you really just shortening the exposure time on the focal plane array, or are you doing something else? How are ISO speed and ‘shutter speed’( I know there is not really a shutter) related? Do you have two variables here to play with or just one?
Thanks!
When you shift the ISO, I think two things happen in the camera
1. The analog amplification used in the sensor is cranked up. My understanding is that there are amplifiers between the photo sites and the analog to digital converters in the hardware. Turning up the gain lets you use the entire range of the ADC while collecting less light.
2. Of course, this means that noise and such goes up, so the image processing pipeline must be adjusted to compensate. The JPEG engines have gotten pretty good at this.
The end result of pushing the ISO up is that you get to shoot at faster shutter speed (or smaller aperture) for a given amount of light hitting the camera. So in a sense, in a digital camera the ISO value is a third variable that you can shift around to get to the exposure you want.
I googled around a bit. This page seems to have a reasonably coherent and accurate description of what is going on as part of a general discussion about noise.
http://www.ronbigelow.com/articles/noise-1/noise-1.htm
Thanks for the insight and the reference!