
Somewhat uncharacteristically Pittsburgh has had five reasonably clear nights in the last two weeks. In fact, we’ve had so many nights that I actually skipped one due to fatigue. On the other nights, I have taken the opportunity to try and fine tune setting up my little observational “system” for maximum efficiency. I hesitate to say that I succeeded since the device still regularly confuses me. But with my captured images as evidence, I will say that I’ve managed to improve what I can see by a substantial margin over the last couple of months. All this, plus a surprise.
There are three parts to the puzzle:
1. Mount setup, especially polar alignment.
2. Picking the right effective focal length.
3. Setting up the computer for image capture.
Mount and Alignment
The first two go hand in hand. So we will cover them in an interleaved fashion. It is axiomatic that the performance of the mount determines the focal length you can use. Since I am cheap, I bought an inexpensive Celestron mount (the CG-5) with relatively crude mechanics. This means that it has rather large tracking errors which would be magnified greatly by a long focal length. In addition, I am lazy so I have not set up an autoguider to correct those tracking errors. This means:
1. I should use the shortest focal length that I can get away with.
2. I should set up the mount as well as possible (within the constraints of not having a permanent position) to minimize tracking errors created by misalignment and such.
My telescope has an aperture of 200mm and a native focal length of around 2000mm (F10). After playing with many combinations, I decided that for my telescope while the image scale at F5 (1000mm) was pleasing, especially with smaller objects, the mount just could not track well enough. So, I finally settled on a setup that gives me F3.5 (around 700mm).
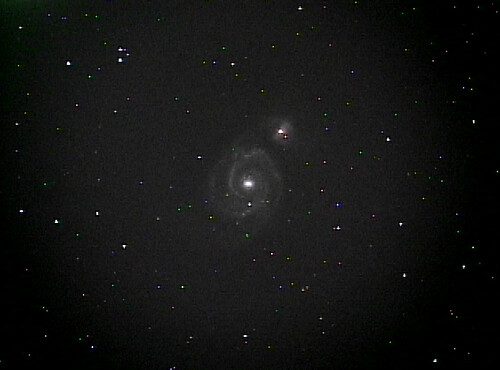
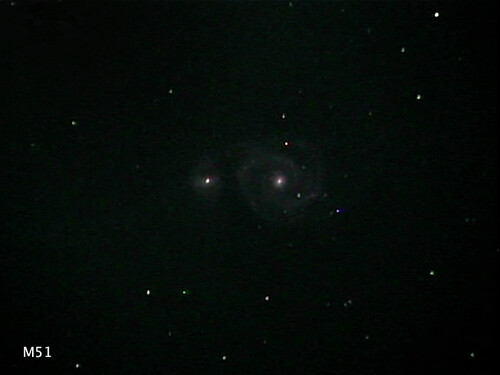
The following images of the galaxy M51 illustrate the difference in image scale and tracking quality:
First, at F3:
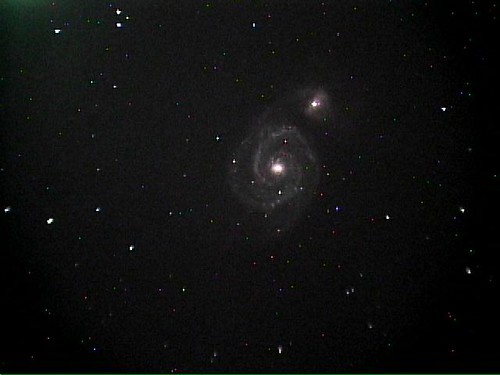
Second, at F3.5 to F4:
Finally, at F5 or a bit more:
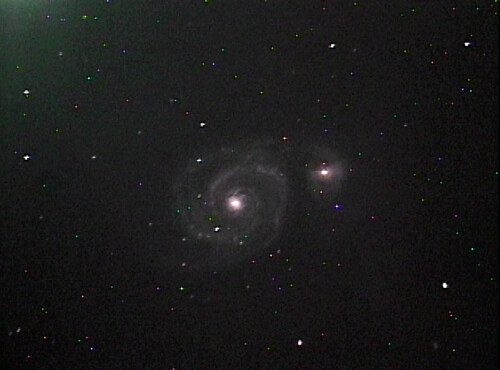
The shot at F3 has way too much vignetting to really be usable. At F3.5 things are a lot better. The tracking is a tiny bit worse, but still tolerable. You can see a lot of detail in the object. Finally, at F5 the object is a nicer size, but we are right on the edge of what the mount can manage without guiding. The stars are a bit fat and the detail in the object can get blurred.
The second half of the mount performance equation is how well we set the mount up in the first place. Recall that the general scheme goes like this:
1. Set up the mount on the patio. Point the leg of the tripod under the polar axis roughly north.
2. Put the scope on the mount and balance.
3. When it is dark enough, turn the telescope sideways so you can look through the hole in the polar axis. Adjust the mount until you can see Polaris in the hole.
4. Plug the mount in and do a pointing alignment. The mount will point at 2 stars in one side of the sky and up to 4 on the other side.
5. Try to end step four on a star near the meridian and fairly high in the sky. Use this star to run the polar alignment software in the mount.
While this seems simple enough in principle, the mechanics of the mount and the temperamental nature of the software make every night a new adventure. Here are my tips for making your setup a less stressful experience. Note that these tips are by no means a complete method for foolproof setup. I still find that every other time I go out something weird happens and I throw my hands up in frustration. I find that it’s better to go out expecting the to do the alignment twice, because you will anyway.
So, things to watch out for when setting up a Celestron CG-5:
1. If you are doing the 2+4 star alignment and the mount does not seem to be getting any better at pointing, you probably aligned on the wrong star a couple of steps back. Unplug the mount and try again. Don’t try to fix it, just start over. The UI on the handbox is not really set up to effectively replace alignment information. I have tried to do this a few times when I realized that everything had gone wrong, and it just makes it worse.
2. The accuracy of the initial pointing will vary widely based on how the mount is feeling or whether you got lucky on your initial rough polar alignment. Don’t be surprised if the first couple of stars don’t even make it into a wide field finder scope. My finder is 5 degrees across and yesterday I spent the whole night missing. But, this does not really effect the final accuracy of the pointing system. After all my frustrations, I got the best pointing I have ever had last night. Good tracking too.
3. Don’t start aligning the mount too early. Without other stars as references, you are likely to guess badly and then you need to go back to step 1.
4. If you have a sequence of stars that works, milk it for as long as possible. Whenever you change the stars you use for alignment you are just asking for the mount to change up on you and go nuts. This happened to me when I decided to toss Dubhe into my list one night. Two problems: the mount did not seem to point at Dubhe, and I don’t really know where Dubhe is. Needless to say I started over again.
5. Try and arrange for the +4 part of the 2+4 to be on the side of the meridian where you want to be working for most of the night so you avoid doing a meridian flip. Also, I have had weird problems with the mount pointing off into la-la land if I do a meridian flip just before or right after finishing the polar alignment. So beware. Generally I try to end up in the West, because the sky to the West is not blocked by my house.
6. Plan ahead with the alignment stars to avoid areas of your sky blocked by trees, or houses. This is why aligning in the Eastern half of the sky doesn’t work for me.
7. When adjusting the latitude of the polar axis with the awful hand screw, always miss too low on purpose so that you hit alignment while tightening the screw. This way it won’t loosen later.
8. Occasionally, usually when everything has gone perfectly and you are polar aligned in 10 minutes, your first GOTO will send the scope pointing into the ground. At this point you should power down and go inside and have a beer. Since you are setting up a video camera, you don’t need to worry about wrecking your dark adaption. This is the best thing by far about using this camera, by the way.
Finally, I like to align with a high power eyepiece and switch to the camera after. This calibrates the pointing system with a smaller field of view, which in my experience means you get better pointing.
If all of this seems like a lot of work, it is. Last night I spent about 90 minutes doing trying to make sure that I could repeatably get a good polar alignment in a systematic fashion. I can’t really say I succeeded, because I was still confused about a few things. Also, I only got to spend an hour actually looking at anything. But The M51 capture above made it worth it.
The Rest
Now that the scope is set up, here is the rest of the checklist.
1. Connect the control and video cables to the camera.
2. Plug the video camera into the USB capture box. I use a cheap Dazzle DVC100. I have also played with a Firewire box and it is better, but the post processing tools, strangely, are better on Windows. So I’m using USB for now.
3. Fire up Parallels on the Mac. I use this because VMWare would not talk to my video capture widget. After the capture device connects, run AMCap to capture video. This is a .NET example program that does video capture. I use it because the brightness and contrast controls are much better than anything I’ve found on in MacOS for adjusting the video in real time. There are a few video processing applications for MacOS, but the native brightness/contrast/color controls are all awful. Clearly someone needs to fill this void.
4. Put the focussing mask on the telescope and go outside with the iPhone and focus the scope using the iPhone to watch the video feed via VNC. This is the future baby.
5. Take the mask off and go back inside with the hand controller for the mount. Now you can sit inside and point the telescope at what you want to see. Adjust the video with AmCap. Do screen captures to record your conquests.
I use Skytools to make lists of things to see. Skytools is very useful, but I find the UI clunky. I would like someone to take his databases and make a leaner planning program for the iPad. You could make tens of dollars doing this.
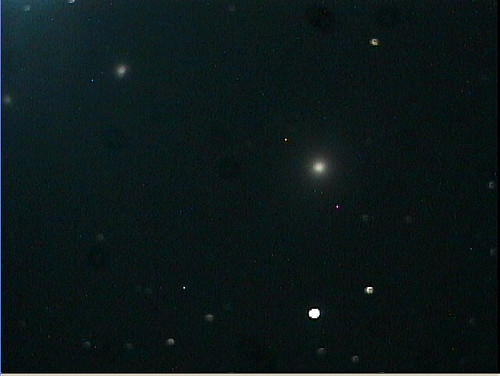
Lately, I’ve been working in the Virgo Cluster of galaxies because it’s almost summer and this is my last chance until next year. A month ago I was happy to get this out of focus and not so detailed shot of M87 and some companions. I was just amazed that there was anything there at all:
Last weekend, I managed to do this:
This has the nice feature that it’s actually in focus. The tracking is also a lot better. Good enough to capture this small detail in M87: the famous jet. Here is a slightly closer look:
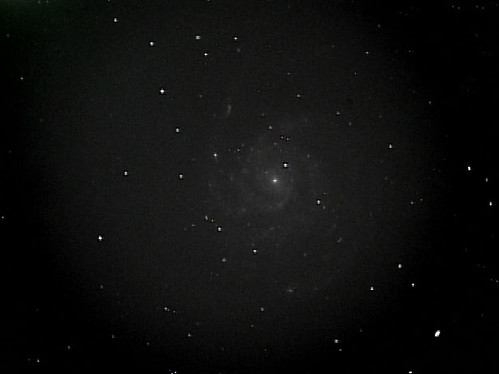
Here are a few other favorites from this area and close by:
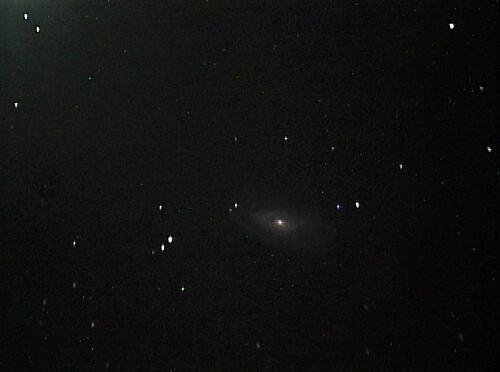
M94:
M101:
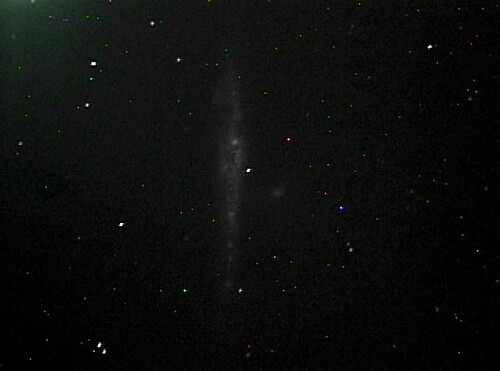
NGC 4631:
and M88:
Finally, a Surprise
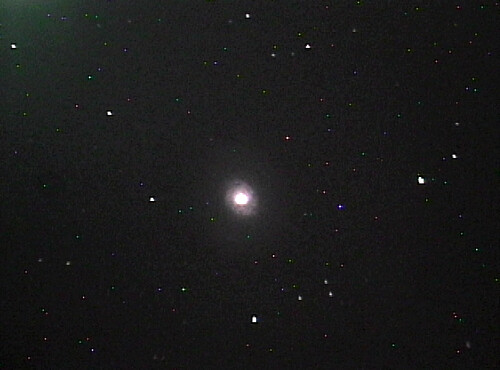
One thing I’ve been doing to make myself feel better is to revisit objects I looked at last month and try to do better this month. Along these lines, I’ve taken a bunch of pictures of that old favorite, the Whirlpool Galaxy M51. Here is my first one from two months ago:
Here is the one I took yesterday:
I’m fairly happy with the progress.
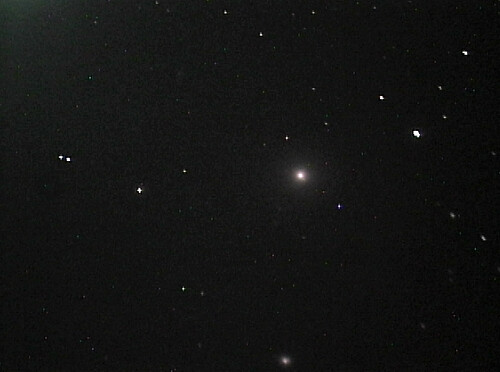
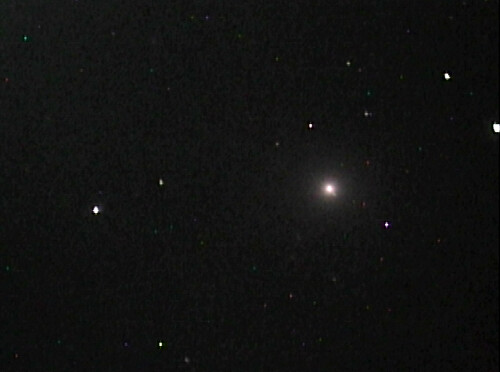
Having taken so many pictures of the same object, I came across the following cosmic surprise. Here is a shot of the galaxy taken on May 30:
And then again two days later:
If you study the two pictures you will note that there is a “new” star in the second one that is not in the first. To the left of the core there is a straight line of three stars. The middle one is the new one. If you don’t feel like finding it, go to the Flickr image and it’s already marked there.
It turns out that this is a supernova that had been discovered by some amateurs in France just the day before. A single star 35 million light years away explodes with such violence that a little video camera in my sky-glow-filled suburban back yard can pick it up as a new point of light in a 45 second exposure. I never would have imagined that this would be possible 25 years ago.
I guess I’ll have to get a guider.


“5. Take the mask off and go back inside with the hand controller for the mount. Now you can sit inside and point the telescope at what you want to see. Adjust the video with AmCap. Do screen captures to record your conquests.”
Wait, you’re doing your observing INSIDE in a COMFY CHAIR? Whoa, this IS the future!
Damn kids, don’t know what we had to go through, guiding at the top of a ladder out in the cold and dark….mutter mutter
I’ve spent my share of time sitting in the cold and the darkness. I see no reason to suffer anymore if I don’t have to. That, and not worrying about dark adaption are the best things about this video camera.
Wow, what wonderful photos. I do not have a telescope, and never used one, but I wish I had one. Maybe, if I find a good job I can buy one. Thanks again for sharing these pics.