
Pittsburgh is on its way to about the tenth day in a row where the dusk brings a bank of clouds and haze from the west. So I’m going to talk about field of view, image size, focal length and image size and a cool photo-related astronomy service. Anyway, we’ll start with a horribly dry and boring technical discussion having to do with optics.
Focal Length and Focal Ratio
The focal length of a simple telescope the distance the light must travel before it comes to a single point of focus in the optical system. In lens-based systems this is a property of the main objective lens. Light enters the system through the front of the lens and comes to focus somewhere in back of the lens. The distance from the focal point to the center of the lens is the focal length. Similarly with mirror-based systems the light hits the front of the mirror and then comes to focus somewhere in front of it.
The focal ratio of a simple telescope is the ratio of the focal length of the scope to the size of its aperture. So, if your Newtonian telescope has an 8 inch mirror and a 80 inch focal length, then its focal ratio is 80/8 = 10. For some reason we write this “F10″ to make sure everyone understands what is going on.
Many telescopes are made up of multiple lenses, multiple mirrors, or some combination of both. My Celestron C8, for example, uses an optically neutral lens, a concave mirror and a convex mirror. The concave mirror is around F2. The convex mirror has a “negative” focal ratio of F5. I’m not sure how this is computed, since convex mirrors don’t focus the light at all. In any case, this arrangement stretches the effective focal length of the primary resulting in an F10 telescope.
Why Do We Care?
The short answer is: the focal length of the telescope determines, to a large extent, the apparent size of the objects that you look at with that telescope. The general rule is this: longer focal lengths make things bigger.
If you are using your eyeballs to look through the telescope, you can’t just look into the back end of the scope and see an image. You actually need a second lens to put the image on your eyeball. This lens, or set of lenses is called an eyepiece. Eyepieces come in various sizes and shapes, and since they are lenses, they have focal lengths. In general eyepieces with long focal lengths are for looking at large fields of view at low power. On the other hand, eyepieces with short focal lengths are for looking at small fields of view at high power. In other words, the final object size in your field of view is determined by a combination of the characteristics of the telescope and that of the eyepiece.
This turns out to be handy. You can carry a bunch of different eyepieces around with you and pick which one to use based on how big the object is that you want to look at. This is how things worked for hundreds of years, until someone invented cameras.
Cameras are different
Here’s an unexpected annoyance when you switch from using eyepieces to using a camera: the camera always sees the same field of view. The field of view of the camera is completely determined by two measurements:
1. The effective focal length of the telescope.
2. The size of the sensor in the camera. Ok, so you might be using film, so the film size would matter instead of the sensor size. But chances are you are not, so let’s forget about that.
Since the size of the sensor in most cameras is fixed, if you want to change the size of the field of view covered by your pictures, the only thing you can do is manipulate the effective focal length of the telescope. Another way to put this is that the only way to change the scale of the objects in your pictures is to change the focal length of the telescope. If you want to take a picture of something really small, you want a long focal length. If you want to take a picture of something really large, you want a short focal length.
At first this seems sort of inconvenient. Carrying multiple telescopes around is a lot harder than carrying a small bag of eyepieces. Luckily, those clever optical designers have again come to our rescue. It turns out that you can buy any number of special lenses that attach to the end of a telescope and manipulate the effective focal ratio.
Some lenses flatten the light cone and therefore stretch the focal length. We call these barlow lenses. On the other side of the coin, focal reducers make the light cone steeper and make the effective focal length shorter. Thus, as a general rule Barlows make things bigger, and focal reducers make things smaller.
Focal Reduction is Your Friend
For Mallincam use, it turns out that we are generally more interested in shorter focal lengths than longer. There are several reasons for this:
1. The chip in the Mallincam is small. In addition, the camera’s strengths lie in capturing images of deep sky objects, which tend to be more extended in size than (say) double stars or planets. Therefore, generally the case that you are trying to fit relatively large objects on to the relatively small chip, so reducing the image scale is a good thing. Now, this is not always true. If you are hunting tiny planetary nebulas, you’ll need to be working at a relatively long focal length.
2. Short focal lengths usually mean smaller F-ratios. From our lessons in photography we will all remember that smaller F-ratios mean shorter exposures. This is true in astrophotography too, at least for the extended deep sky objects that we tend to use the Mallincam for. Shorter exposures are always a good thing.
3. In addition to shortening exposure times, short focal lengths mean that you can get away with sloppier tracking in your telescope mount. This is because you are effectively working at a lower level of magnification, so tracking errors will not be as evident.
So Now What?
There is no lack of advice on how to combine various focal reducers with the Mallincam. Just consider this PDF file with dozens of different combinations. The available hardware for this can be summarized in the following list:
1. Reducers that attach to the back of your telescope using the standard Schmidt-Cassegrain threads. These tend to be designed specifically for SCTs, but who knows, maybe they can work elsewhere. Celestron, Meade, Antares and others all make an .63x reducer that hooks up this way. Meade also makes a .33x reducer that is designed only to be used with small CCD cameras. Conveniently, the Mallincam is just such a camera. I have a Celestron .63x which I also use with my eyepieces.
2. Reducers that attach as eyepiece filters. The best example of this is the Antares .5x reducer. There are a few others. But I have this one so I’ll talk about it.
3. Special reducers made specifically for the Mallincam that thread on the front. These can be hard to come by. I have an MFR-5, which is a two piece device which I will talk about in a bit. Rock Mallin has also made an MFR-3 which was a single lens. The use of this lens is covered in the PDF I linked to above.
4. If you use Celestron telescopes, you can look into the Hyperstar system. This device lets you run your SCT at around F2, which is pretty cool. This works particularly well for larger apertures. For smaller scopes, the image scale gets to be too small to be useful.
5. Finally, various optical companies make custom reducers/field correctors just for their telescopes, usually refractors. You can find these devices made by Vixen, Astro-Physics, Televue, Borg and others. I don’t have any of these (maybe soon!).
For my purposes below, I’ll cover some experiments that I have done with devices that fall into the first three buckets above, since I actually own them.
Computing Effective Focal Length
This turns out to be harder than you think. You would naively hope that when you buy a focal reducer, somewhere on the box it would say something like “when you attach this to your telescope, it will cut the focal length in half.” Unfortunately, it’s not that simple. The effective focal length your telescope with the focal reducer added depends on the optical qualities of the reducer and on the spacing between the reducing lens and your eyeball, or the CCD in the camera. The Celestron/Meade/Antares “F6.3″ reducer is specified as being a .63x reducer, but this is only actually true if the spacing is just right. If you are closer to the lens than the assumed distance (around 90-100mm, I think), then the final reduction is a bit smaller. If you are further away, then you get more reduction.
This effect is why you see so much traffic on the Mallincam groups about putting “spacers” between the camera and the focal reducer. Note that while you can get some mileage out of changing the spacing, if you get too far outside of the optimal range you will experience various optical maladies, the most obvious of which will be light fall-off in the corners of your picture. The more you push the reduction the worse this gets, since the steeper light cone will inevitably can only cover a smaller image area. This is why reducers like the Meade .33x can only be used with small chip CCDs. Put anything bigger behind it and you get dark corners.
In addition, you may have trouble focusing your telescope and you may find that the image at the edges of the field of view are distorted in strange ways. These issues all reflect the fact that the focal reducer is working against the laws of physics and trying to get you a free lunch.
Now, there are some optical formulas that let you plug in the focal length of the focal reducer and the spacing and compute the effective focal reduction. However, these are of limited use for two reasons:
1. Focal lengths tend not to be specified, and measuring the spacing is hard.
2. The formulas go out the window if you use multi-lens systems. This is because you can manipulate the spacing in multiple places and wen you do that who knows how the reduction factors combine. The MFR-5 has this problem since you can put spacers between the two lenses or just after them. You can also end up confused if you combine the Celestron .63x reducer with another lens.
A better way to figure out what your effective focal length is is to just use the camera to take a picture and then compute the field of view of the picture. If you know the field of view covered by the picture and you know the size of the CCD you used to take the shot, then you can solve for the effective focal length. Now, you might ask, how do you compute the field of view covered by a picture? Here the Internet comes to the rescue. All you do is this:
1. Join Flickr.
2. Joint the astrometry Flickr group.
3. Take your screen gran and add it to the group’s pool.
4. Wait.
If your shot is clean enough, the bot that watches the pool will grab it and compare it against a huge database of star and object positions. Usually it will then tell you what part of the sky you took a picture of and the size of the field of view covered by your photo. I have a few examples here in my Flickr page. This one is the best:
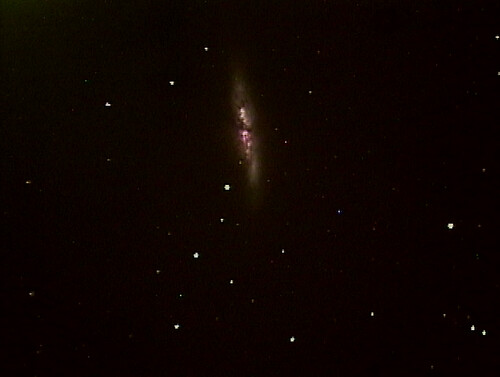
Note the comment from the Astrometry bot. It tells you the coordinates of the center of the photo, the size of the field, and even all of the interesting objects in the picture, in case you didn’t know. This is fantastic. Anyway, I take the field of view and then use Skytools 3 to match it with the right effective focal length. Skytools has an engine that will show you the field covered by your camera at a given focal length, so you can just plug values into that until you get something that matches. If you don’t have Skytools there are any number of other package that do this, including some handy web pages.
Using this scheme, I have tested the following configurations of focal reducing lenses, and computed the efective focal length for each one:
1. The Antares 1.25″ .5x reducer. This one is designed to be used with around 50-60mm of extension. I did not have quite that much, so in my pictures the effective F-ratio (with my C8) is about F5.5 instead of F5.
2. The MFR-5 with a 5mm spacer between the lenses. This gives you F5.
3. The MFR-5 with a 10mm spacer behind the entire assembly. This gives you F3.5 or so. This combination also produced obvious vignetting.
4. Finally, the Celestron .63x combined with the front lens of the MFR5 the standard 1.25″ diagonal. This also gave me around F3.5. I used this odd combination because I fit in my diagonal without bottoming out on the mirror. Since I switched to the GEM I stopped using the diagonal so this is not that critical anymore. Still, it’s a nice combination.
The next test I plan to run if I ever get a clear night is to combine the .63x reducer with the Antares. I expect to get to around F3.5 or hopefully a bit less. I might also try the Meade .33x focal reducer.
In my telescope, I find that F3.5 is nice because everything is a bit brighter, but the image scale at F5 has been better for the smaller galaxies that you tend to look at in the Spring. Your mileage will vary according to the aperture of your telescope and the quality of your mount.
I will note here that my measurements of the MFR-5 do not match what appears on the various Mallincam web sites, in the Internet forums and in the camera’s documentation. I have no insight into why what I found was different, but my numbers are consistent and I’m fairly confident that they are right.
Summary
1. Focal length determines field of view and therefore image scale in the camera. For the Mallincam, shorter focal lengths tend to give you a better image scale.
2. Shorter focal lengths also reduce your focal ratio and therefore your exposure times.
3. Focal reducers can do their job well, but only under certain constraints, like spacing and the size of the final image circle.
4. With an 8 inch SCT telescope, working at F5 to F3.5 is a good range of focal lengths. Any shorter and stuff gets too small. If you need to go wider, it’s probably wiser to get a wider field telescope.


